

How to Build a Strong GitHub Profile as a Student

This guide shows you how to transform your GitHub into a powerful profile as a student which stands out among other student developers.
Introduction
Everyone used GitHub as a dumping ground for their projects, just using it simply for what it was designed for, which is source control, and collaborating with others on a project or contributing towards open source. But in 2020, when GitHub released this new feature of creating our very own unique readme profile, it provided a way for developers and artists alike to showcase their work professionally in the form of a “personal resume” on GitHub. That’s all it is, a special repo that acts as a visually impressive portfolio for other developers and employers to check out. So read on for some incredible tips on building a strong GitHub Profile!
Steps to Build a Strong GitHub Profile as a Student
1. The Very First Steps
To start designing your GitHub profile, we first have to create a new public repository. Click the “+” icon at the top right and choose “New Repository”. After that comes the critical step, make sure that the name of the repo is the same as your username. Refer to the example below:
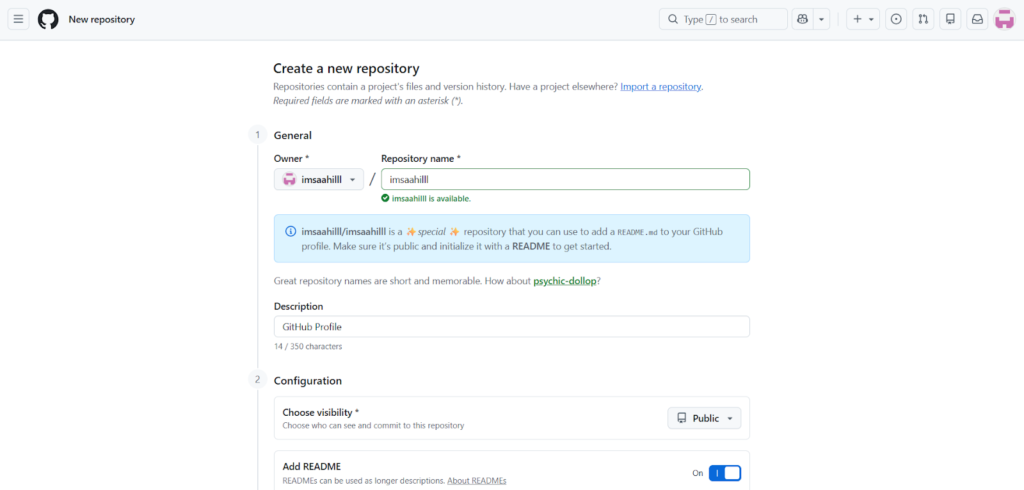
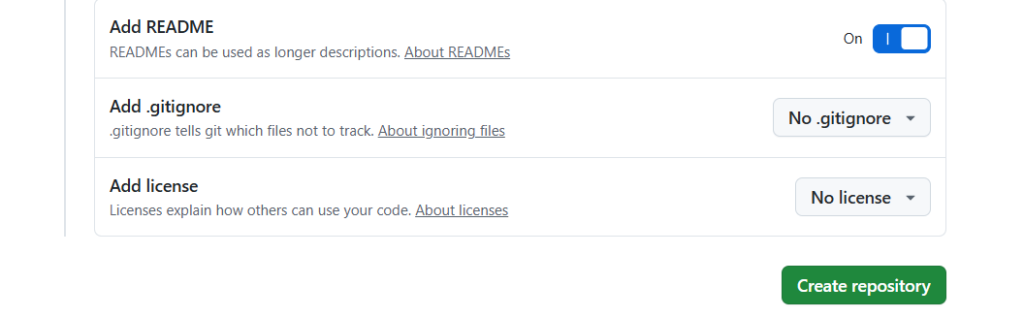
GitHub will let you know that you have found a special repo whose README.md file can be customized. We want to keep this repo “public” so that it can be displayed on your GitHub profile. You can provide a brief description of the repository (e.g. “My GitHub Profile”) though this step is optional. After that, tick the checkbox “Add a README file” and click on “Create repository”. Going ahead, we will alter this README file and personalize it.
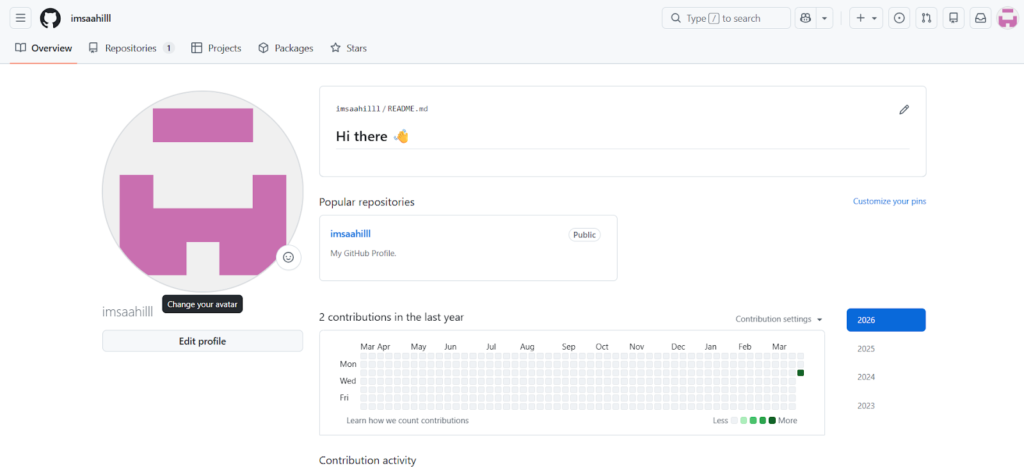
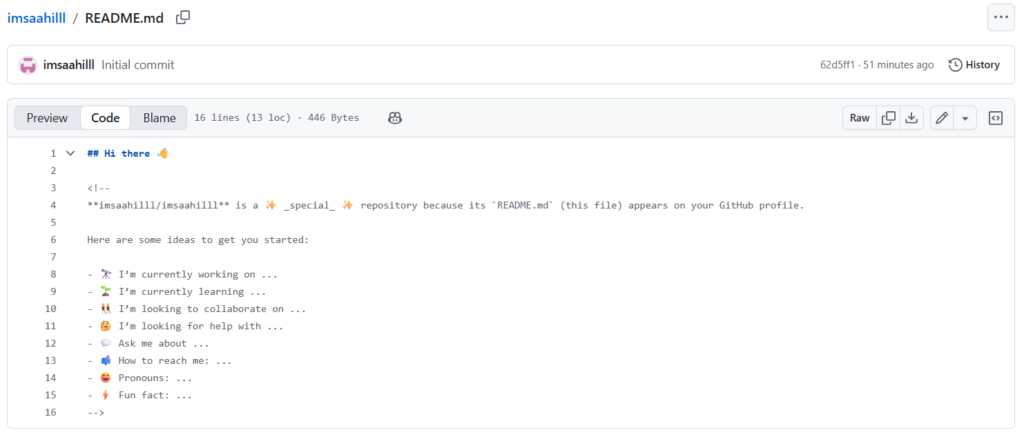
Well done! The repository should now be generated with a simple greeting message in the README.md file. If you navigate to your profile, you should now see this message displayed.
While this is a good first step, it’s now time to customize the page and add a personal touch to it. The good part about this process is that you can make the changes right from the browser without having to worry about Git commands. To begin customizing the profile page, you can click the pencil-button to edit the file in the top-right corner. This would bring us to the file editor where you can make changes to the README.md file.
2. A Unique Header
Your profile’s header is the first thing that people will observe so it must stand out from the other profiles. We want that initial “hook” that attracts the viewer. And for that to happen, my suggestion would be to avoid following the common design norms. For example, many developers use this layout for their “About” section:
It’s completely fine to use this template though as long as you change other aspects of your profile. I went in another direction for creating the header and then added the “About Me” section after that.
3. The “About Me” Section
This is the section that I was talking about earlier where most developers use the template shown above. If you want to make your profile stand out, then I would suggest changing the design aspects of this section as well. I went ahead and used YAML format while editing the readme so that the information reads like code when you preview the profile.
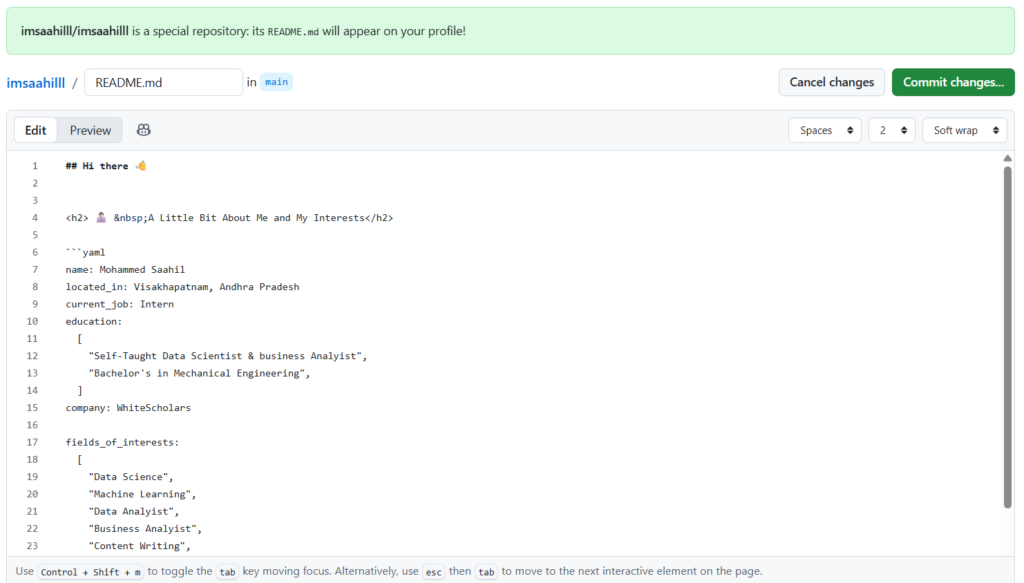
It adds a touch of professionalism and also as a bonus, looks neat! To display.
4. Tools and Tech Stuff
In this section, you can showcase your skills and list the tools and technologies that you’re familiar with. I always prefer minimal and crisp design choices over cluttered data.
Here are some other cool things you can add to your GitHub profile to make it stand out:
- Links to your other online profiles: Do you have a portfolio website or a blog where you write about coding? Include links to those in your profile so people can learn more about you and your work.
- A list of your coolest projects: GitHub is all about code, so why not show off some of your best projects? You can link to your repositories directly in your profile, or even create a short description of each project to give people a taste of what you’ve been working on.
- A fun fact about yourself: Let your personality shine through! Add a fun fact about yourself that isn’t coding related. Do you love playing the guitar? Are you a champion cat herder? (We won’t judge!) Adding a personal touch can make your profile more memorable.
Also, don’t forget to brag a little (but in a good way) with stats! Stats show how active you are on GitHub and how much you’ve contributed to the coding community. Stats are a great way to show potential employers that you’re not just a hobbyist coder, but someone who is actively involved in the world of software development. There are lots of cool stat generators out there that can create fancy graphics to show off your GitHub awesomeness.
5. Your GitHub History
Finally, at the end of your Profile README, you can practically include anything. Some developers add their Github stats or some add a fun little snake game on your GitHub contribution graph
Conclusion: Level Up Your Profile Today
Your GitHub profile README isn’t just a resume, it’s your digital handshake. A polished one can land interviews, collaborations, and that dream full stack or data science gig. Start simple, iterate boldly, and watch recruiters notice. Pin it, share it, and commit to consistency. What’s stopping you? Fork someone inspiring, tweak it, and make it yours. Happy profiling!
Frequently Asked Questions
1. Do I need to know Git commands to create a profile README?
No! Edit everything directly in GitHub’s web editor. Just click the pencil icon on README.md, make changes, preview, and commit. No cloning or pushing required.
2. What if my username repo already exists or is taken?
It can’t be taken GitHub reserves it for you. If it’s private or missing, delete/recreate it as public. Double-check spelling matches your exact username.
3. Can I add images, GIFs, or custom badges to my profile?
Absolutely! Use Markdown like  for images/GIFs. For badges, grab free ones from shields.io or GitHub stats tools. Host images on Imgur or GitHub Issues for reliability.
4. How do I update my profile README after initial setup?
Simple: Go to your username repo > README.md > Edit (pencil). Changes appear instantly on your profile. Pin the repo to the top of your repos list for max visibility.
5. Will a great profile README really help get jobs in full stack or data science?
Yes—recruiters scan GitHub first. It showcases skills, projects, and activity beyond a resume. Pair it with strong repos (e.g., MERN apps or ML projects), and it can spark interview invites.